The HTML DOM (Document Object Model)
When a web page is loaded, the browser creates a Document Object Model of the page.
What is the HTML DOM?
The HTML DOM is a standard object model and programming interface for HTML. It defines:
- The HTML elements as objects
- The properties of all HTML elements
- The methods to access all HTML elements
- The events for all HTML elements
Source: W3 schools
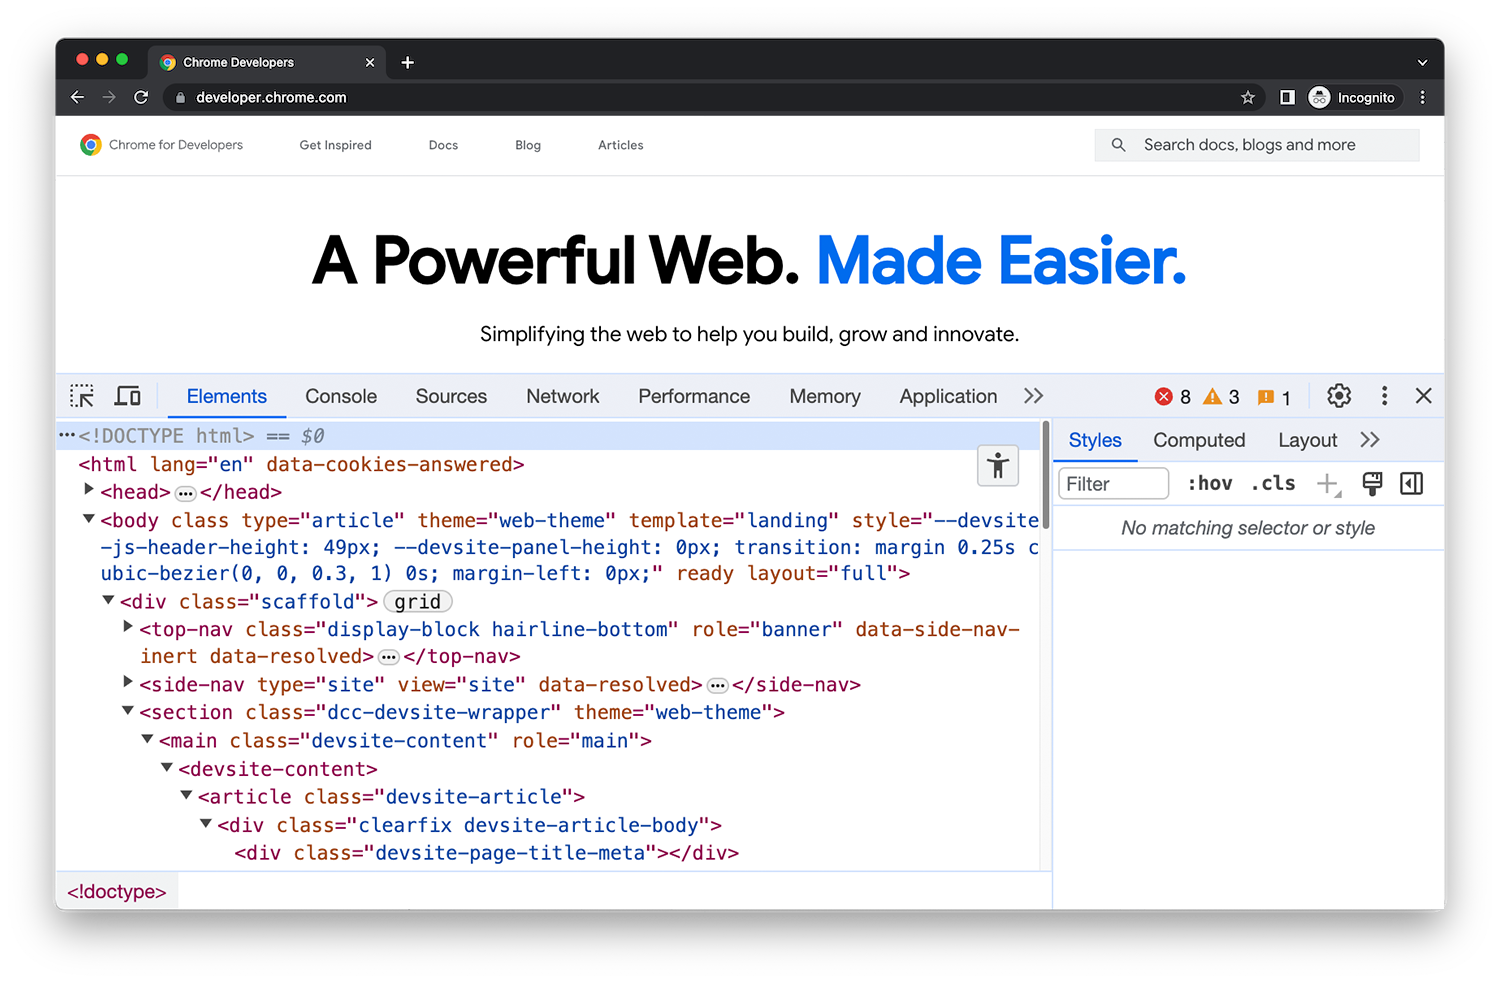
Chrome DevTools
Chrome DevTools is a set of web developer tools built directly into the Google Chrome browser. DevTools lets you edit pages on-the-fly and diagnose problems quickly, which helps you build better websites, faster. There are many ways to open Chrome DevTools. My favorite on a Mac is Cmd + Option + I

Open Chrome DevTools with keyboard shortcuts
| OS | Elements | Console | Your last panel |
|---|---|---|---|
| Windows or Linux | Ctrl + Shift + C | Ctrl + Shift + J | F12 Ctrl + Shift + I |
| Mac | Cmd + Option + C | Cmd + Option + J | Fn + F12 Cmd + Option + I |
Manipulating the DOM
Let's write some code that will listen for a Firebase Realtime Database update and when an update occurs will update the DOM! Open up your code editor and create a new file that is named index.html
HTML Template (index.html)
<!doctype html>
<html lang="en">
	<head>

		<meta charset="utf-8">

		<meta name="viewport" content="width=device-width, initial-scale=1">

		<title>Photo Stream</title>

		<link href="https://cdn.jsdelivr.net/npm/bootstrap@5.3.3/dist/css/bootstrap.min.css" rel="stylesheet" integrity="sha384-QWTKZyjpPEjISv5WaRU9OFeRpok6YctnYmDr5pNlyT2bRjXh0JMhjY6hW+ALEwIH" crossorigin="anonymous">

	</head>

	<body>

		<main class="container py-5" id="mainContent">

			<div id="masonryCards" class="row masonCards" data-masonry='{"percentPosition": true }'>

				<div class="col-sm-6 col-lg-4 mb-4">

					<div class="card">

						<img class="bd-placeholder-img card-img" src="https://photos.smugmug.com/Brooks-the-Bison/Brooks-Mascot-on-Campus/i-W8vQdw7/0/a022228c/L/141A4795-L.jpg" alt="Brooks the Bison">

					</div>

				</div>

			</div>

		</main>

		<script src="https://cdn.jsdelivr.net/npm/bootstrap@5.3.3/dist/js/bootstrap.bundle.min.js" integrity="sha384-YvpcrYf0tY3lHB60NNkmXc5s9fDVZLESaAA55NDzOxhy9GkcIdslK1eN7N6jIeHz" crossorigin="anonymous"></script>
		<script async src="https://cdn.jsdelivr.net/npm/masonry-layout@4.2.2/dist/masonry.pkgd.min.js" integrity="sha384-GNFwBvfVxBkLMJpYMOABq3c+d3KnQxudP/mGPkzpZSTYykLBNsZEnG2D9G/X/+7D" crossorigin="anonymous"></script>

	</body>

</html>
We'll use Bootstrap, a powerful, extensible, and feature-packed frontend toolkit to quickly style our webpage. In the code above we use their CDN but you can download and host the css/js on your own or use one of their many package managers.
Add a JavaScript event listener.
<script>

window.addEventListener("load", function(){

	initApp();

});

</script>
Copy the code above and place it under the last <script> element and above the </body> tag.
This script will listen for the page to be loaded and then execute a function called initApp();
Add the Firebase config to the head section of your document.
<script src="https://www.gstatic.com/firebasejs/4.9.1/firebase.js"></script>
<script src="https://www.gstatic.com/firebasejs/4.9.0/firebase-firestore.js"></script>
<script>
	// Initialize Firebase
	var config = {
		apiKey: "AIzaSyA2UE7qguPrDe_ZYYUo2xvGRQVxnpKH7BY",
		authDomain: "iteach-org.firebaseapp.com",
		databaseURL: "https://iteach-org-default-rtdb.firebaseio.com",
		projectId: "iteach-org",
		storageBucket: "iteach-org.appspot.com",
		messagingSenderId: "93856860303",
		appId: "1:93856860303:web:a1991ec28021b1d7d788fa"
	};

	var app = firebase.initializeApp(config);
	var database = firebase.database();

	initApp = function(){

		i = 1;

		var messagesUpdate = firebase.database().ref('dom-images/');

		messagesUpdate.once('value').then(snapshot => {

			messagesUpdate.orderByKey().limitToLast(1).on('child_added', function(snapshot){

				if(i != 1){

					var container = document.getElementById("masonryCards");

					var newChild = document.createElement('div');
					newChild.classList.add("col-sm-6");
					newChild.classList.add("col-lg-4");
					newChild.classList.add("mb-4");
					newChild.innerHTML = '<div class="card">' + snapshot.val() + '</div>';

					container.insertBefore(newChild, container.firstChild);

					setTimeout(function(){

						var msnry = new Masonry( '.masonCards', {"percentPosition": true });
						window.dispatchEvent(new Event('resize'));

					}, 1000);

				}

				i++;

			});

		});

	};
</script>
Copy the code above and place it just above the </head> tag.
The script contains the following:
- The first two lines are external scripts needed by Firebase.
- var config is an object used by Firebase to identify the Firebase project, this is generated by Firebase when you create a project.
- var app initializes the Firebase app reference in the config object and var database references the database in the config object.
- initApp is a function that listens for any children that are added to the dom-image Firebase database object. When a child is added, it will update the DOM element that has an id attribute with the value of masonryCards.
- We'll add a new child to the DOM element with the id of masonryCards and we'll insert that new element before the current first child of masonryCards
- Then we'll call the masonry function again to reset the grid.
Send a pic!
Keep your browser open and text a picture to 435-500-5522 to watch the magic happen ;) here is a link to the photo-stream page.

Final thoughts
Manipulating the DOM can be fun and daunting but Chrome DevTools makes life much easier when you are building frontends that are dynamic!
Trent Staheli
trent@iteach.org
435-879-1130

